Feeding bees while feeding ourselves - backyard wickingbeds:
This blog post is not directly a post about bees, rather it is a post about how we can support bees in our own backyards while producing heaps of veggies and feeding ourselves while using the least amount of water to produce crops.
The setup shown features float valves, optical levels, dedicated filling / drainpipes and more, giving you options of hand filling as well as more automated float valve / irrigation-controlled options so you can go on leave without needing to have someone remember to top up the wicking beds for you!
Before we get going in showing you our construction, here is an excellent study about wickenbeds worth pointing out:
Study about wicking materials and water holding and wicking characteristics:
https://www.roogulli.com/wicking-beds
Building our version of wickingbeds step by step:
OK, this is the final product of our wickingbed, and our Paulownia tree coming along nicely as an initial test.
Once done, meassure to your desired height of the wicking bed, in our case we stick to 60cm, this allowing 25-30cm of sand, and another 25-30 cm of soil for optimal wicking performance.
Once done, cut up the IBC bladder at 60 cm in our case, having previously ensured the IBC bladder is actually holding water and does not have any punctures. Also it is good practise to keep them filled for several days to ensure the tap is sealing correctly.
Western Australia is usually fairly dry and using a grinder during the hot season outside is a big NO-NO by DFES legislation, hence, do the right thing and grind behind closed doors using the appropriate PPE.
The drainpipe unfortunately on this picture is shown within the 100mm pipe, which in later pictures we have moved out of the 100mm pipe.
Also please note the piece of GeoTex fabric placed over the IBC drain hole, which avoids sand and dirt clogging up the drain if needed.
Additionally, you can see the drain / filling pipe covered in GeoTex too, looping around to allow an adequate distribution of water when manually filled in a fast pace.
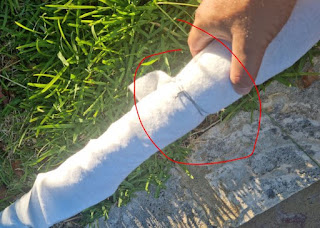
Below you can see the secret technology involved in our water level indicators. Find a few wine bottles, have a good time and hang on to the corks. then stick them on a piece of wire. 2x corks tend to be needed for the side going into the water to generate enough lift to make it stick out at the top.

#Update a few month later in regards to using corks:
Use plastic straws with different colors for water level and use a polystyrene float as that tends to work better than the corks.
We put in 25mm Poly pipe from Bunnings, and once again used GeoTex fabric from stopping any debris coming into the pipe from the bottom.
The only main concern is to stop your wicking material from entering your drainpipe and wrapping it with GeoTex fabric. This is probably the task which will take you the longest out of all individual tasks.
Make sure to remember to put GeoTex over your IBC drain hole, prior filling sand, as this is easily forgotten in the heat of getting on with the task!!
Once you filled your bottom half with the wicking material you can start filling it with water in order to level out the wicking material.
Prior filling your wickingbed with your growing soil ensure you place another piece of GeoTex Fabric between the wicking material and the soil, while ensuring you lift the edges up so no soil can pass through the sides of the container into the wicking material.
We do not have the classic drain hole as other people tend to have. In wintertime we will have to keep an eye out if things get waterlogged, however in WA we don't always get that much rain and we will just see how it goes. Worst case the IBC tap can be used to open up or attach a screw cap with a 19mm water hose and set it to the correct drain overflow, just slightly over the float valve setting to fully automate the draining in case of overfilling the IBC.
When buying halfways established veggies at places like bunnings, make sure you pop them into a bucket of water, wash of the soil. Once done, you can easily transplant the individual plants without damaging their root systems, while poking a deep hole into your soil and planting them, giving them access to the wicking magic right away!
Assuming you plant a lot of crops, you could potentially place an air-stone from an aquarium pump into the bucked and just let it bubble away for a few minutes or hours until you come back and all the earth would most likely be bubbled and washed away.
Update on the growth:
Things have literally gone banana's with those wickingbeds, as it was started late in the season around mid January which is pretty much in the middle of the hot season and at present in mid March which is going into our Autumn the wicking beds look like below:


